You need your phone number to make FaceTime calls or send messages via iMessage. And while you usually shouldn't expect any problems when using these very popular iOS features.
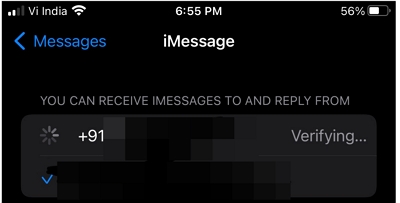
It is not uncommon for you to see the "Verifying Phone Number" screen when trying to use FaceTime and iMessage. Here, we will talk about this issue, why it can happen, and what you can do about it.
This issue commonly occurs with new devices, particularly when attempting to use FaceTime or iMessage for the first time.
Several factors can contribute to this problem, including poor internet connection, incorrect iPhone settings, Apple server glitches, misconfigured SMS settings, or system issues. Fortunately, there are multiple solutions available to address these underlying iOS issues.
Note: It may require up to 24 hours for your carrier to validate your phone number with Apple. Please reach out to your carrier to ensure that you can send and receive SMS messages. After attempting the following troubleshooting steps mentioned, allow up to 24 hours for the verification process to complete.
The first thing to do when you see this error is to make sure that you are connected to the internet via a Cellular Data network or Wi-Fi.
On an iPhone, you need SMS messaging to activate your phone number in iMessage or FaceTime. You may be charged for the SMS depending on your carrier. If you encounter a prompt indicating "Your carrier may apply charges for SMS messages used to activate FaceTime and iMessage," tap "OK" to authorize potential SMS fees.
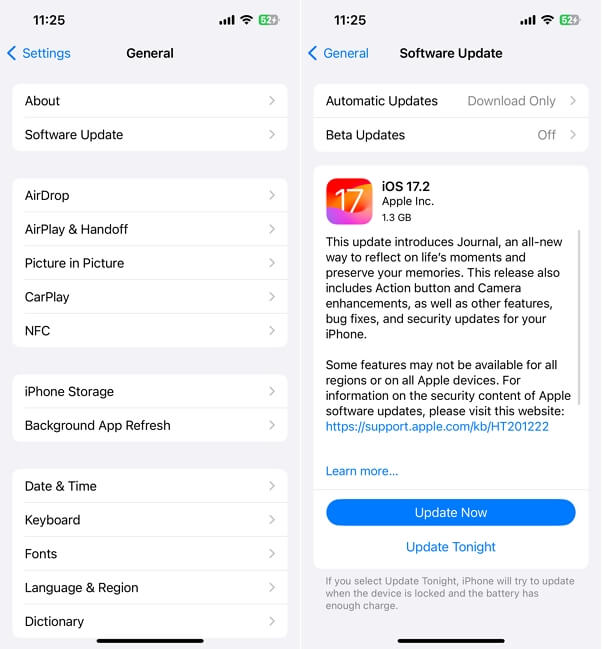
This process will also be affected if the date & time you have set up on your device is not correct. So, go to Settings > General > Date & Time and make sure the time zone is selected correctly.

It is also possible that the iMessage and FaceTime are not working properly and you may need to turn off and restart both apps to get them to function properly. Use these simple steps to do it:
Step 1: Open the Settings from the Home Screen. Tap on "Messages" and turn off "iMessage."
Step 2: Then open the Settings again and tap "FaceTime" to turn it off again.
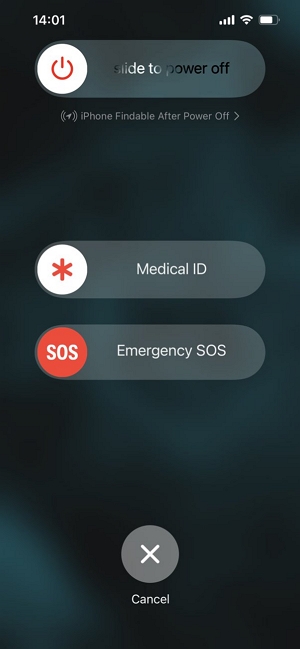
Step 3: Restart the iPhone by pressing and holding the Side button for a few seconds and when the "Slide to Power Off" screen appears, drag the slider to turn off the device. Wait at least 30 seconds before restarting the device again.
Step 4: Turn on iMessage and FaceTime again.
Apple regularly updates iOS with new features, bug fixes, and security upgrades, making it essential to ensure your device is running the latest version of iOS or iPadOS.
Before you proceed to update your iOS, we strongly advise backing up your iPhone.
Here's a step-by-step guide:
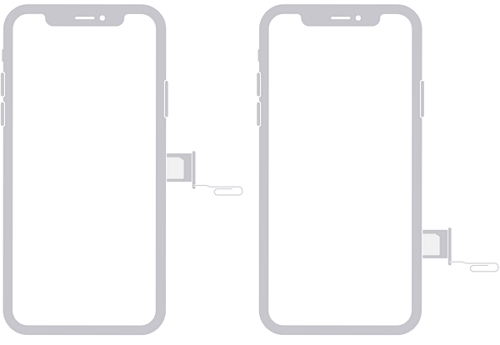
If your iPhone still displays "verifying phone number," from your iMessage or FaceTime app, it may be due to an incorrectly positioned SIM card.
To address this, power off your iPhone and use an ejection pin to remove the SIM card. Reinsert the card securely into the tray and restart your iPhone. This simple procedure often resolves the issue.
Checking your network settings is also essential to remove some of the network issues that can cause problems with the features and apps on the device.
To check network settings, follow these steps:
Check Network Settings:
Switch to a Strong Network:
Reset Network Settings
Note: This will reset Wi-Fi networks and passwords, cellular settings, and VPN settings:

If the above steps do not resolve the problem, you should consider performing a hard reset on the device. This is an effective solution for addressing functions or system glitches on your device
The method you use to hard reset the device will depend on the iPhone model:
For iPhone SE, 6S, and older models: Press and hold the Power and the Home Buttons at the same time for a few seconds. Release both buttons when you see the Apple logo appears on the screen.

iPhone 7 and 7 Plus: Press and hold the Power and the Volume Down buttons at the same time for a few seconds. Let go of both buttons when you see the Apple logo appear on the screen.

iPhone 8 and newer models: Quickly press the Volume Up button, quickly press the Volume Down button and then press and hold the Side Button until the Apple logo pops up on the screen.

If even a forced restart doesn't fix the problem, your next best bet may be to restore the iPhone. The problem with restoring your iPhone using iTunes or Finder is that you may end up losing some or all of the data on your device.
To avoid losing data on the iPhone, we recommend using the iOS system recovery tool: AceFix. It is one of the best ways to diagnose and fix the most common iOS stuck issues without causing data loss. To use it, follow these simple steps:
Step 1: Start by downloading and installing AceFix on your computer. Then follow the onscreen instructions to set up the program.
Step 2: Open it after installation and connect the iPhone to the computer using USB cables. Select "iOS System Repair".
Step 3: Select "Standard Repair" to attempt to fix the device without losing data.
Step 4: You should then see the latest firmware that you install on the device. Click "Download" to begin downloading the firmware needed to fix the device. The firmware download will begin immediately and should take only a few minutes.
Step 5: When the firmware has been downloaded, click on the "Fix Now" to begin repairing the device.
Your iPhone should restart soon after the repair process is complete and you shouldn't have any issues with any other function of the device.
If the issue is not resolved with the above solutions, try the following:
